ลอกแนวทางการ setup environment บน macOS ของผมมาใน Windows
เมื่อปีที่แล้วเขียน blog เกี่ยวกับ productivity tools ใน macOS ไป ก็เลยคิดว่าถ้าต้องมา code ใน Windows ขึ้นมาหล่ะ (ซึ่งก็เป็นอย่างงั้นจริงๆ ฮ่าๆๆ) ดังนั้นใน blog นี้ก็จะมาบันทึกแนวทางการ setup คร่าวๆ บน Windows ให้คล้ายคลึงกับ macOS มากที่สุด
สิ่งที่ต้องมีอย่างแรกคือ Windows Subsystem for Linux (WSL)
ถ้าจะให้คล้ายกับ macOS ก็ต้องรันคำสั่ง Linux ให้ได้อ่ะนะ ก็สามารถติดตั้ง WSL และ Linux distribution ที่ชอบผ่าน Microsoft Store ได้เลย อาจจะเลือกเป็น “Ubuntu” ก็ได้ หรือจะเข้าผ่าน https://www.microsoft.com/en-us/p/ubuntu/9nblggh4msv6?activetab=pivot%3Aoverviewtab ก็ได้ (ยกเว้น Windows 10 S mode นะ)
ปล. บทความนี้ใช้ได้กับ WSL version 1 เท่านั้นนะครับ เนื่องจาก version 2 เปลี่ยน architecture เป็น Managed VM ไปเลย ดังนั้นการ configure proxy จะไม่สามารถทำผ่าน VPN ของบริษัทได้นะครับ (ดูรายละเอียดเพิ่มได้ตามนี้ https://docs.microsoft.com/en-us/windows/wsl/compare-versions)
ต่อมาคือการ configure proxy (ถ้ามี)
บางคนทำงานในบริษัท จะ connect อะไรก็ต้องผ่าน proxy server ถ้าไม่ผ่านก็ไม่สามารถลง dependencies หรือ plugins ที่เราต้องการได้ วีธีการ set proxy ก็รันคำสั่งนี้ได้เลย
➜  ~ export http_proxy="http://username:password@host:port"
➜  ~ export https_proxy="http://username:password@host:port"
ทีนี้เราก็สามารถลง dependencies ผ่าน apt ได้แล้ว
ปัญหาที่เจอคือ พอปิด terminal session แล้วเปิดขึ้นมาใหม่ พบว่า environment variable ที่เคย set ไว้หายหมด เลยต้อง set ใหม่ทุกครั้ง
ให้ไป set configuration แบบถาวรในไฟล์ .bashrc แทน
เข้าไปแก้ไขไฟล์ .bashrc ตามนี้
➜ ~ vi ~/.bashrc
จากนั้น save และปิด-เปิด terminal ใหม่ หรือใช้คำสั่งเพื่อ reset session ใหม่ก็ได้
➜ ~ exec bash
ดังนั้นต่อไปถ้าต้องการจะรันคำสั่งใดๆ ทุกครั้งที่เปิด session ใหม่ ให้เอามาใส่ไว้ใน .bashrc เสมอ
แต่ง terminal ให้สวยงามใช้ง่ายด้วย fish-shell และ oh-my-fish
คล้ายๆ กับ iTerm2 และ oh-my-zsh มี plugin ให้เลือกเยอะพอๆ กันเลย แต่จะไม่มี git plugin แถมมาให้ ตอนใช้งาน apt จะต้องใส่ -E เพื่อเรียกใช้ proxy
➜  ~ sudo -E apt-add-repository ppa:fish-shell/release-3
➜  ~ sudo -E apt-get update
➜  ~ sudo -E apt-get install fish
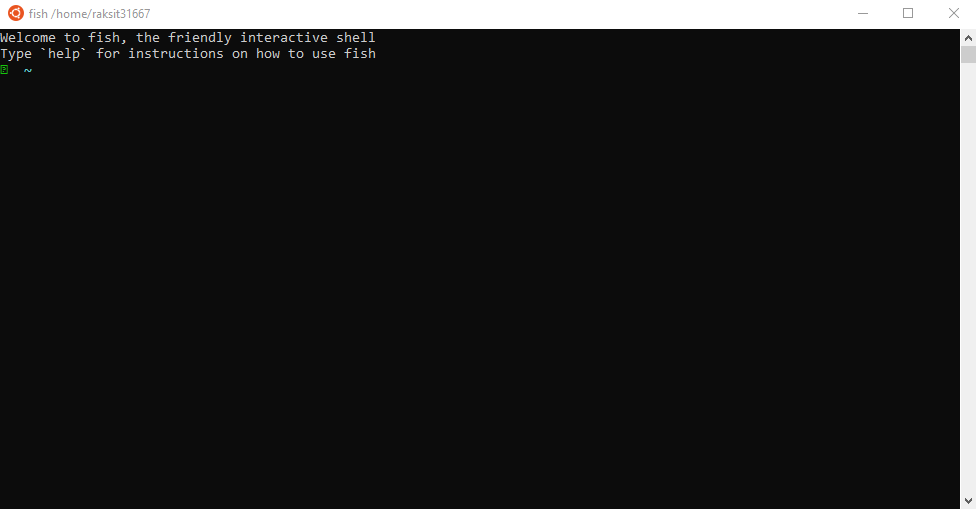
เช่นเดียวกันกับ proxy configuration ให้เราใส่คำสั่งลงไปใน .bashrc เพื่อให้เรียกใช้ fish เป็น default shell ของเรา
จากนั้น reset session ก็จะได้หน้าตาประมาณนี้

ต่อไปทำการติดตั้ง oh-my-fish
➜ ~ curl -k -L https://get.oh-my.fish | fish
จากนั้นลองรันคำสั่ง omf
➜  ~ omf help
Oh My Fish! - the fish shell framework

USAGE
    omf [options] [<command>] [arguments]

DESCRIPTION
  Provides options to list, download and remove packages, update the framework,
  create a new package, etc.

COMMANDS
  cd            Change to root or package directory.
  channel       Get or change the update channel.
  describe      Show information about a package.
  destroy       Uninstall Oh My Fish.
  doctor        Troubleshoot Oh My Fish.
  help          Shows help about a command.
  install       Install one or more packages.
  list          List installed packages.
  new           Create a new package from a template.
  reload        Reload the current shell.
  remove        Remove a package.
  repositories  Manage package repositories.
  search        Search for a package or theme.
  theme         Install and list themes.
  update        Update Oh My Fish.
  version       Display version and exit.

OPTIONS
  -h, --help
    Display this help.

  -v, --version
    Display version and exit.

  For more information visit → https://git.io/oh-my-fish
ติดตั้ง Themes และ Plugins ผ่าน oh-my-fish
ในส่วนของ theme นั้น จริงๆ oh-my-fish เค้ามีมาให้เลือกคร่าวๆ แล้วนะ ดูได้ที่นี่เลย https://github.com/oh-my-fish/oh-my-fish/blob/master/docs/Themes.md ก็เลือกกันตามชอบเลย
➜  ~ omf theme
Installed:
default         robbyrussell

Available:
agnoster                clearance               es                      harleen
        mokou                   pygmalion               slacker                will
aight                   cmorrell                fishbone                idan
mtahmed                 random                  slavic-cat              wolf-theme
ays                     coffeeandcode           fishface                integral
nai                     randomrussel            solarfish               yimmy
barracuda               cor                     fishy-drupal            jacaetevha
nelsonjchen             redfish                 spacefish               zeit
batman                  cyan                    fisk                    johanson
neolambda               red-snapper             sushi                   zephyr
beloglazov              dangerous               flash                   kawasaki
numist                  rider                   syl20bnr                zish
bira                    default                 fox                     krisleech
ocean                   robbyrussell            taktoa
bobthefish              dmorrell                gentoo                  l
one                     sashimi                 technopagan
bongnoster              doughsay                gianu                   lambda
pastfish                scorphish               toaster
boxfish                 eclm                    gitstatus               lavender
perryh                  separation              tomita
budspencer              edan                    gnuykeaj                lolfish
        pie                     shellder                trout
cbjohnson               eden                    godfather               mars
plain                   simple-ass-prompt       tweetjay
chain                   emoji-powerline         graystatus              mish
pure                    simplevi                uggedal
ตอนลงก็ใช้คำสั่งนี้เลย
➜  ~ omf install <your-theme-name>
➜  ~ omf theme <your-theme-name>
สำหรับ git plugin ผมเลือกใช้ตัวนี้ https://github.com/jhillyerd/plugin-git ส่วนตัวคือดี เพราะคล้ายๆ กับที่ใช้ใน oh-my-zsh
สำหรับใครที่ติดปัญหาเรื่อง SSL certificate ตอนใช้ apt
ตัวอย่างเช่นผมจะลง CloudFoundry CLI ก็จะมีขั้นตอนตามนี้
➜  ~ wget -q -O - https://packages.cloudfoundry.org/debian/cli.cloudfoundry.org.key | sudo apt-key add -
➜  ~ echo "deb https://packages.cloudfoundry.org/debian stable main" | sudo tee /etc/apt/sources.list.d/cloudfoundry-cli.list
➜  ~ sudo apt-get update
➜  ~ sudo apt-get install cf-cli
มันจะขึ้นมาประมาณนี้
Hit:1 http://us-east-1.ec2.archive.ubuntu.com/ubuntu bionic InRelease
Get:2 http://us-east-1.ec2.archive.ubuntu.com/ubuntu bionic-updates InRelease [88.7 kB]
Ign:3 https://deb.nodesource.com/node_10.x bionic InRelease
Get:4 http://us-east-1.ec2.archive.ubuntu.com/ubuntu bionic-backports InRelease [74.6 kB]
Err:5 https://deb.nodesource.com/node_10.x bionic Release
  Certificate verification failed: The certificate is NOT trusted. The certificate issuer is unknown.  Could not handshake: Error in the certificate verification. [IP: XX.XXX.XX.XX 443]
Get:6 http://security.ubuntu.com/ubuntu bionic-security InRelease [83.2 kB]
Reading package lists... Done
...
N: Updating from such a repository can't be done securely, and is therefore disabled by default.
N: See apt-secure(8) manpage for repository creation and user configuration details.
วิธีแก้คือให้ mark PPA (personal package archive) ซึ่งก็คือ unofficial repositories ให้ [trusted=yes] จะต้องไม่ต้องมียุ่งกับ signature ที่ไป sign ผ่าน GPG (GNU Privacy Guard) key เพื่อเอาไปเช็คว่า repository นั้นเป็นของจริงหรือเปล่า โดยให้เราเข้าไปแก้ที่ไฟล์ /etc/apt/sources.list.d/<your-repository-name>.list ตามนี้
deb [trusted=yes] https://packages.cloudfoundry.org/debian stable main
จากนั้นรันคำสั่ง apt อีกครั้งเป็นอันจบงาน